Sketching - The First Step
Last weekend I received an email from a young lady who said she liked my paintings and would like to do something like them herself but she didn’t know how to start. She wanted to know if there is a simple "painting by numbers sort of technique" that she could follow which would give her the basic skills to create a painting worth framing and hanging on her wall.
Since receiving the email I have given the question a great deal of thought. Is a simple approach which would produce an acceptable painting possible? I think the answer is a qualified yes. The qualification? Well, if the approach has to be simple then the picture content will also have to be fairly simple as well. Complex subjects necessarily imply complex drawing.
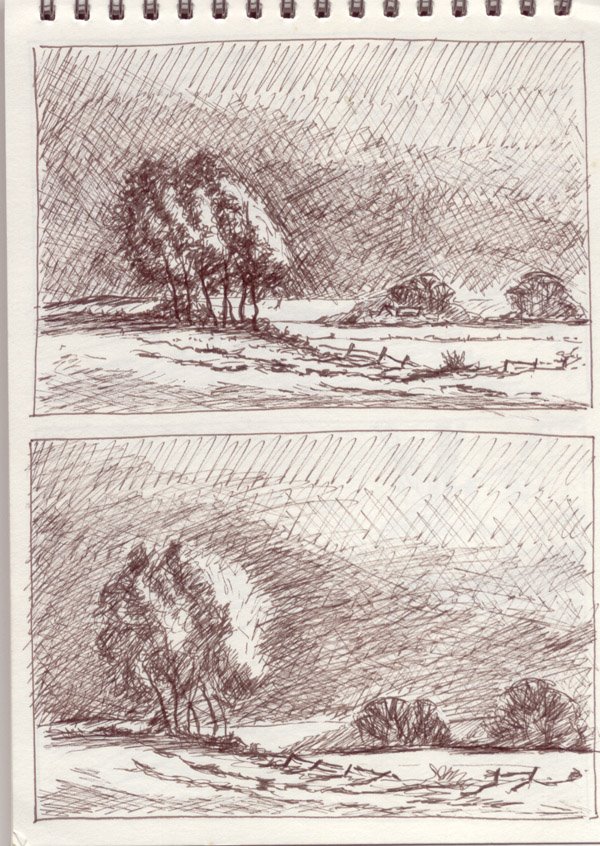
The picture above is a scan of a page from one of my sketchbooks. The subject is simple, just a couple of trees. The important features of these two sketches are the layout and the subjects’ lighting. The picture is about light - the effect of low angle light illuminating the trees against a dark, sombre sky.
The page shown here is from an A5 Daler Series 2 sketchbook. The pages are approximately 8 by 5 inches which is large enough for a detailed drawing but convenient in that it fits comfortably into a coat pocket. I also use Daler Lyndhurst sketchbooks in various sizes for different purposes. All the sketchbooks I use have a very firm hard backboard and are spiral bound so that they open out flat for drawing.
The two sketches shown on the page above were carried out using a Pilot drawing pen with sepia ink. I also use a range of pencils varying in hardness from HB to 4B and carry a sharp pocket knife to sharpen the pencils and a soft eraser for making corrections. The latter is not used often as a better way to make corrections is to start with a lightly drawn line and adjust it by overdrawing. This gives the finished sketch a more spontaneous look.
The only other ingredients needed to produce initial sketches are observation and practice. Go out and find a simple subject, which interests you. Then settle down in a quiet position where you will not be disturbed and start sketching. At first your results will probably not look too much like the subject. Stay calm. All is not lost, you can do it. Look carefully at the subject, study it closely, then compare your drawing with it and see where the differences lie. How could your drawing be altered to make it more like the original? Having decided how the drawing could be changed do another one. This time concentrate on those areas which need changing in the first drawing.
Compare the subject and this second drawing. Is it a better representation or can this drawing be improved in any way? If necessary try again. Above all else, do not give up. It will take time but you are only making a sketch. It doesn’t have to be perfect.
I usually put the date and place on my sketches because they are interesting to look back on. I wonder why I didn’t do that with these?
I think that is enough to be going on with. Next week I shall talk some more about sketching and using photographs for note taking.
Until then take your sketchbook with you whenever you go out. Above all use it. Make lots of sketches.
Take care.
Tony
P.S. The two sketches may look a bit like a ‘Spot the Difference’ puzzle. Can you?
posted by Tony Attwood at 12:45 PM
![]()
![]()

0 Comments:
Post a Comment
<< Home